State System
The State System is an incredibly powerful system built into the Ultimate Character Controller. Any game will have the character switching between component values as they play the game. For example, lets take a simple case of zooming the camera by changing the field of view. When the Aim ability is active it could manually set the field of view, but what if you want a different zoom for the assault rifle versus the sword? Normally you’d have to manually add a case for the assault rifle (or sword) and add that to the Aim ability so when the ability is activated it correctly switches field of view. As your game grows this would be a very tedious process. The State System simplifies this by moving much of the work into the editor and solving runtime blending automagically.
The backbone of the State System is the Presets System.
Creating a New State
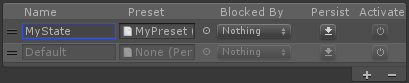
States can be created by selecting a component which has the “States” foldout with the reorderable list. Clicking on the plus button on the bottom right of the state list will allow you to select a state with a new preset or an already created preset. Selecting one of these options will create the new state. After the state is created it must be named. Names are case sensitive and must be unique within the state list.
State Order
The State System works similarly to the layers of a paint program. The state (layer) at the bottom represents the current inspector values of a component. The state above it represents a preset that will override all – or just some – of the underlying state value. The remaining presets in the list will be recombined when a state is disabled or enabled.
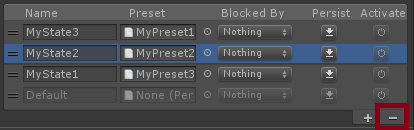
States can be reordered by dragging the two line icon (![]() ) on the left. Any currently active states at the top will override any active states beneath them.
) on the left. Any currently active states at the top will override any active states beneath them.
Default State
The bottom-most state is called the Default state. It represents the standard component values and cannot be edited, removed, or moved.
Active States
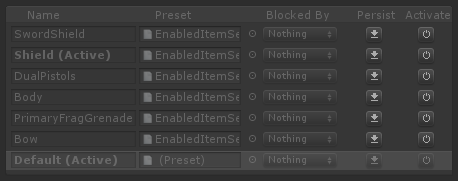
States that are active will be bold and have “(Active)” appended to the end of the state name. States cannot be edited while the game is running so their fields are disabled in the inspector.
Preset
The preset column maps a particular preset to a state. Each state (besides the bottom Default state) must have a preset assigned to it.
Blocking
Sometimes you want states to override each other entirely. For example, you may not want the character to aim down the sights while running, and so you want the Run state to override the Zoom state on the camera and weapon. Theoretically you could block out all underlying states by applying a preset that contains every possible value for the component in question, however this becomes labor intensive very quickly.
State blocking should be used instead. Blocking allows a state to mute one more other states on the component while active. The “Blocked By” dropdown will list the available states that can be blocked.

Every state that is selected will be blocked while the current state is active. States cannot block themselves, states that block them, or the Default state.
Persist
The Persist button will update the preset with the current values of the component. This is useful when you change values within the component and then would like to apply those values to a particular preset.
Activate
The Activate button is a helpful button which will activate a particular state manually. Pressing on the Activate button when a state is active will deactivate the state.
Removing a state
States can be removed by selecting an existing state within the list and then clicking the minus button on the bottom right of the state list.
State Change Callbacks
There are two ways to receive notification of a state change:
Event

If Send State Change Event is enabled on the State Manager then the global “OnStateChange” event will be sent. This event has the following parameters:
GameObject stateGameObject, string stateName, bool active
See the events page for an example of registering and unregistering for events.
Subclass
The StateBehavior and StateObject abstract classes contain a StateWillChange and StateChanged methods that you can override. These methods will trigger when there is a state change on the subclass.
API
Set State
States can be activated or deactivated programmatically with StateManager.SetState:
StateManager.SetState(m_Character, "MyState", true);
The first parameter specifies the GameObject that should have the states activated or deactivated on. The second parameter specifies the state name that should be activated or deactivated. The final parameter specifies if the state should be enabled or disabled (true/false).
The state manager lives within the Opsive.UltimateCharacterController.StateSystem namespace.
Add State
New states can be added at runtime with StateManager.AddState:
using Opsive.Shared.StateSystem;
using Opsive.UltimateCharacterController.Character;
using UnityEngine;

public class StateAdd : MonoBehaviour
{
    [Tooltip("The name of the state that should be added.")]
    public string m_PresetName;
    [Tooltip("A reference to the preset that belongs to the state.")]
    public Preset m_Preset;

    void Start()
    {
        var state = new State(m_PresetName, m_Preset, null);
        var characterLocomotion = GetComponent<UltimateCharacterLocomotion>();

        // gameObject: The GameObject that the state should be added to.
        // characterLocomotion: A reference to the StateBehavior (such as Ultimate Character Locomotion or Camera Controller) or the StateObject (such as Jump or Combat) that the state should be added to.
        // characterLocomotion.States: The current set of states added to the object.
        // state: The state that should be added.
        // 0: The index that the state should be added to. A 0 value indicates the top of the state list.
        StateManager.AddState(gameObject, characterLocomotion, characterLocomotion.States, state, 0);
    }
}