Input System
The Ultimate Character Controller is integrated with Unity’s Input System allowing the player to get input from Unity’s new system rather than the old Input Manager. The demo scene included with the character controller will not work with this integration as the Demo scene scripts use the old Input Manager system.
Setup
- Install the Unity Input System from the Package Manager. The Input System should be enabled within the Player Preferences.
- Download and import the integration from the downloads page.
- Remove the Virtual Controls Manager and any child objects if they have been added to the Canvas. The Input System has its own touch controls and the built-in virtual controls require the Input Manager.
- Remove the UnityInput component from your character. By default the Unity Input component is added to a new GameObject that is a child of your main character GameObject. The GameObject is named after your character followed by “Input”, for example “AtlasInput”.
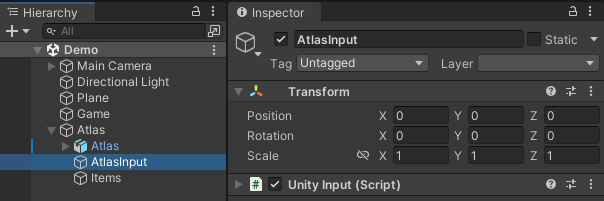
- Add the UnityInputSystem component to the same GameObject.
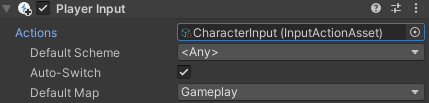
- Add the PlayerInput component to your character if it has not already been added. The included CharacterInput.inputassets file should be specified in the Actions field on the Player Input component.
- Find the PlayerInputProxy on your character and assign the Unity Input component to the Player Input field.
- If you are using the Unity Event System the Standalone Input Module should be replaced with Input System UI Input Module. This can be swapped on the GameObject that the EventSystem component was added to (called EventSystem by default).