Character Creation
The character can be created using the Character Manager from the Tools -> Ultimate Character Controller -> Character Manager menu option. This will open an editor window that acts as the central hub for any object creation/updating related editor scripts.
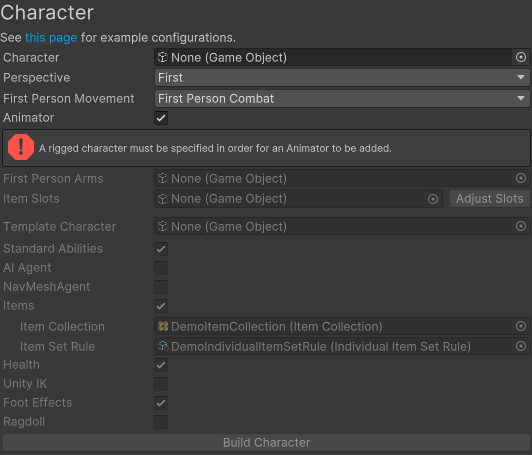
At the moment most of the options are disabled because a character hasn’t been selected. Drag the Atlas model (in the Opsive/Ultimate Character Controller/Demo/Models folder) into your scene and assign it to the Character field.
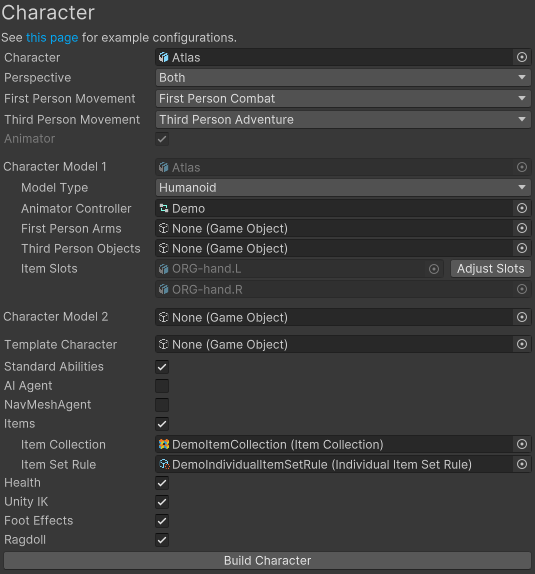
If you are creating a first person or both character there are two more steps required:
- When the first person camera renders it will render any objects in the First Person Arms field last. This will allow the arms to always be in front of the objects and will prevent clipping.
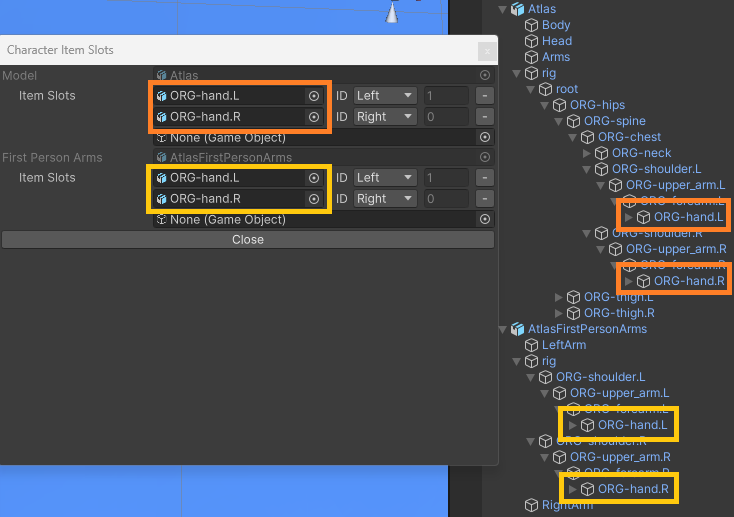
- If items are being added the slots that the item should be positioned in also need to be specified. You can do this by selecting “Adjust Slots” on the right side of the Item Slots field. Slots for the first person arms can be specified within this window.
- If items are being added the slots that the item should be positioned in also need to be specified. You can do this by selecting “Adjust Slots” on the right side of the Item Slots field. Slots for the first person arms can be specified within this window.
- Unless the character model was specifically designed for a first person view, the model is going to have objects that should be hidden when the first person view is active such as the character’s head and arms. Any object that should be hidden when the first person view is active should be specified under the Third Person Objects field. This field will automatically resize when a new object has been added. If your character model does not have the head/arms separated and you don’t have access to the original source file you can separate the objects with a tool such as the FPS Mesh Tool.
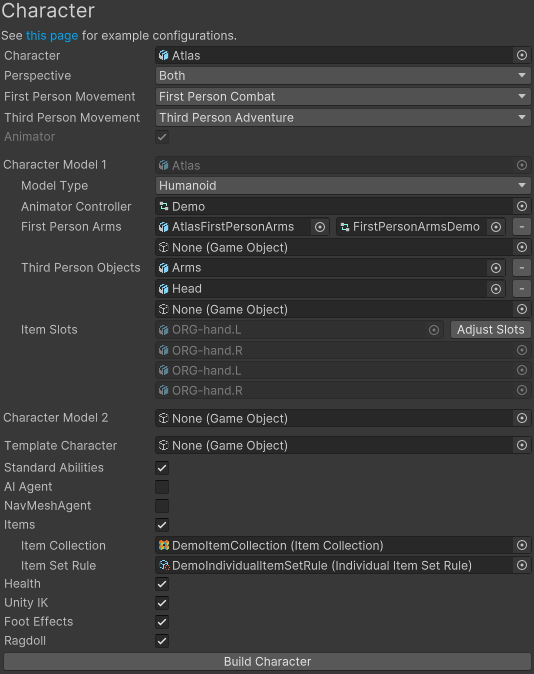
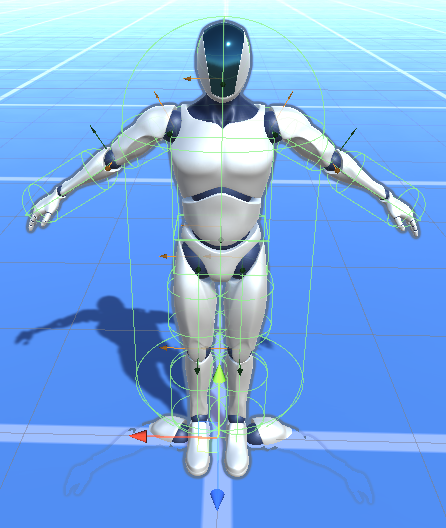
After the Build Character button is pressed all of the components will be added to the character and it can be played within the game. In the screenshot below the materials have been assigned to make it easier to see.
Common character setups can be found on this page.
New Character
The options below are available when creating a new character.
Character
A reference to the character model. This field can be left empty if you’re using a first person perspective and don’t want to have a body/legs.
Perspective
The Perspective field allows you to select a first, third, or both perspective. In order for the perspective to be selected you must have the corresponding asset imported. The both option requires both a first person perspective and third person perspective asset to be imported. See the Component Organization page for more details.
First/Third Person Movement
Specifies the default Movement Type for the character. More Movement Types can be added after the character has been created.
Start Perspective
If the Perspective field is Both, this field specifies which perspective the character should start in. When the character is built the correct movement type will be activated based on the start perspective. The activated movement type should match the active view type on the camera controller.
Animator
This field is required for third person characters, AI characters, or characters that are going to be used on the network. If your character is a humanoid then it can use animation retargeting and use the Animator Controller included with the controller. Generic characters require their own Animator Controller to be setup.
Character Model
Multiple models can be used by a single character. The Character Model fields specify the models that the character can switch to at runtime. Each set of character models have their own set of First Person Arms, Third Person Objects, and Item Slots.
First Person Arms
Visible if using a first person perspective. When the first person items are created they are drawn first by the camera. This field specifics the arms that should be drawn. Multiple items can specify the same set of arms, or each item can use their own set of arms.
Third Person Objects
Visible if using a first person perspective. This field allows you to specify any object that should be hidden when the first person view is active. In most cases this will include the character’s head and arms. This field will automatically resize when a new object has been added. If your character model does not have the head/arms separated and you don’t have access to the original source file you can separate the objects with a tool such as the FPS Mesh Tool.
Item Slots
Visible if adding items. This field allows you to specify where the items should be parented to. With humanoid characters it will default to the left and right hand. If you have specified a First Person Arm you should select “Adjust Slots” and add in any slot locations that belong to the arms.
Template Character
A reference to an already created character that should be used as a template for your new character. See the Templates page for more details.
Standard Abilities
If enabled the character will have the Jump, Fall, Move Towards, Item Equip Verifier, Speed Change, and Height Change abilities added to it.
AI Agent
Allows the character to be specified that it will be used as an AI agent. AI agents do not need certain components that check for player input such as the Ultimate Character Locomotion Handler component. With this option enabled it will also not add the Unity Input component because the AI will be controlling the input rather then an external input source such as a keyboard or controller.
This option does not actually add any AI to the character, it just sets up the character to be able to be used with an AI solution (such as Behavior Designer).
NavMeshAgent
The NavMeshAgent field will add the NavMeshAgent Movement ability to the character if it is enabled. This allows your character to be used with Unity’s NavMesh.
Items
Will the character carry items? If this option is enabled then the item related components such as the Inventory will be added.
Item Collection
Specifies the location of the Item Collection asset if the Items field is enabled.
Item Set Rule
Specifies the location of the Item Set Rule asset if the Items field is enabled.
Health
This option should be enabled if the character has any attributes such as health, shield, or stamina.
Unity IK
Should the character use Unity’s Inverse Kinematics system? Unity’s IK system does not support generics so your character must be a humanoid to use it.
Foot Effects
Specifies if the character should contain any foot effects such as footprints. This uses the Surface System.
Ragdoll
If the Ragdoll toggle is enabled then Unity’s Ragdoll Wizard will add any colliders to the humanoid character.
Existing Character
The Existing Character options are a subset of the New Character options. These options allow you to easily modify a character which has already been created. To get started you must input the existing character in the Character field. An error will appear within the window if your character isn’t an Ultimate Character Controller character.
After you have made your changes you can click the Update Character button. This will apply the changes to the character.