Unity Localization
Localization is a great way to get more exposure on your game by allowing more players to experience your game in different languages and countries. It’s important to start using a localization system early in the development cycle as replacing all the text in a game is time consuming and can require structural changes for dynamic text. For localization the Ultimate Inventory System uses the official Unity Localization package.
Learn about the localization package and how to install it here It is also recommend that you watch the webinar below which explains the benefits of using the Unity Localization package and how to quickly get started:
Once the localization package is installed in your project you can download the integration from the Ultimate Inventory System Downloads page.
Installation Steps
- Install the Localization package using the package manager (use the git url for Unity version before 2021.2).
- Install the integration package from above.
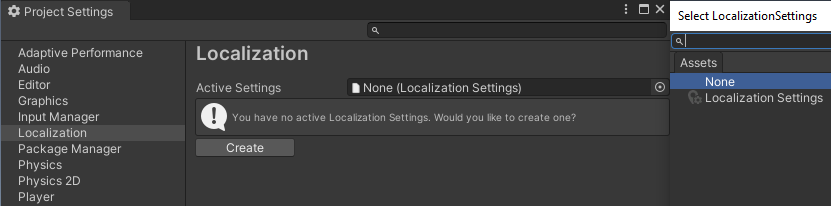
- Go to Edit -> Project Settings and click the “Localization” tab. Ensure you are referencing the Localization Settings asset from the demo scene.
- Open the integration demo scene in Assets/Opsive/UltimateInventorySystem/Integrations/UnityLocalization/Demo to see it in action.
IMPORTANT: After testing the demo it is recommended that you delete the integration demo folder such that you may set your own Localization Settings withing the Project Settings -> Localization. There should only be one localization settings per project.
Integration components
The integration contains two simple scripts which can be extended or replaced.
Localize Item View
The main component of the integration is the “LocalizeItemView” which allows you to write not the item name and also attribute value.

The localize Item View component will create the reference key using the format string provided. The format can be created using those symbols:
- {0}: Item Name.
- {1}: Attribute Value.
- {2}: Item Definition Name.
- {3}: Item Category Name.
- {4}: Attribute Name.
The reference key is then used in the “LocalizeStringEvent” component that comes with the Unity Localization package.
IMPORTANT You must set the Table reference within the Localize String Event component as the Item View only sets the Table Entry Reference.
(Notice how “wood” was set within the Localize String Event component in the screen shot below even though it will be replaced at runtime)
Auto Localize String Event
The Auto Localize String Event component has been extended from the Localize String Event component that comes built-in the Unity Localization Package. It automatically detects the Text component next to it and sets it in the inspector. This prevents you from having to set the string event action manually with each change.
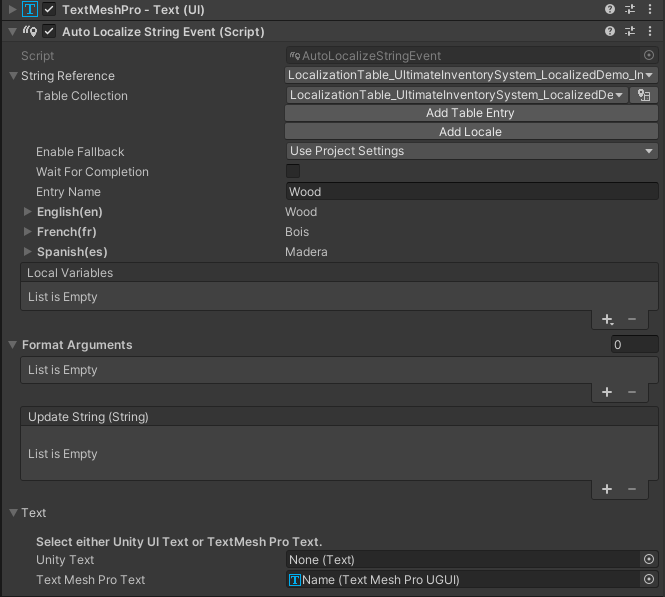
It also comes with the SetTableEntryReference method:
/// <summary>
/// Set the table entry reference.
/// </summary>
/// <param name="tableEntryReference">The table entry reference to set.</param>
public void SetTableEntryReference(string tableEntryReference)
{
    StringReference.TableEntryReference = tableEntryReference;
    RefreshString();
}
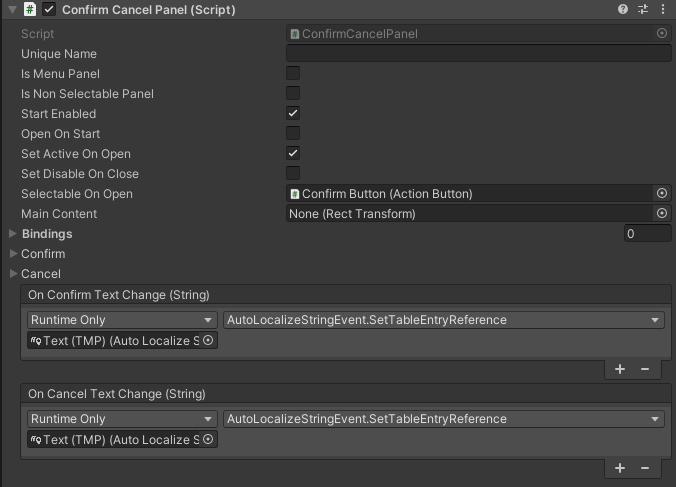
This method is used to set the table entry reference from a String Unity Event. For example the Confirm Cancel Panel within the Shop Menu.
Note that the Localization package also allows for Asset localization in addition to text. For those it is required to write custom components that use a string Attribute as key.
Item Description
The Item Description usually writes the Name and the description of the item directly to the (TMP) Text component. When using the localization packages that is not what we want because there will be a race condition between the Item Description writing the text in the original language and the localization component writing the text in the localized language.
Therefore you should remove the references to the Text component within the Item Descritption component, and let the Localized Item View do the writing. (Refer to the localized demo scene for an example)
The Localized Demo
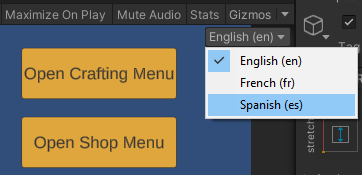
The integration demo scene uses the same Inventory Database as the main demo scene. The localization demo shows translations in English, Spanish and French. The CSV file containing the translations is also included. It is highly recommended that you go through the integration demo scene to see how the integration works. This demo scene includes a Shop and Crafting UI where some components were added to translate all the text.
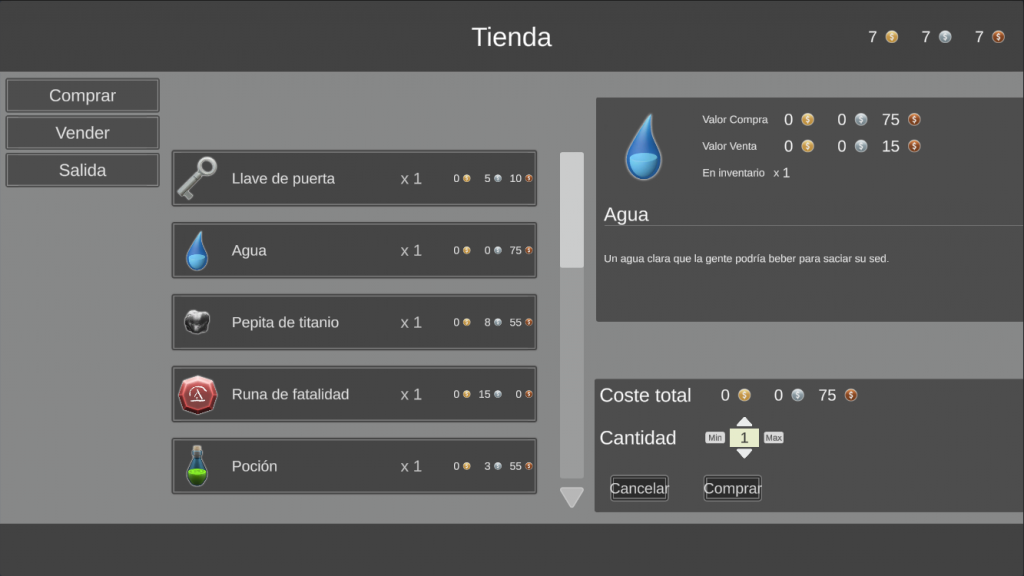
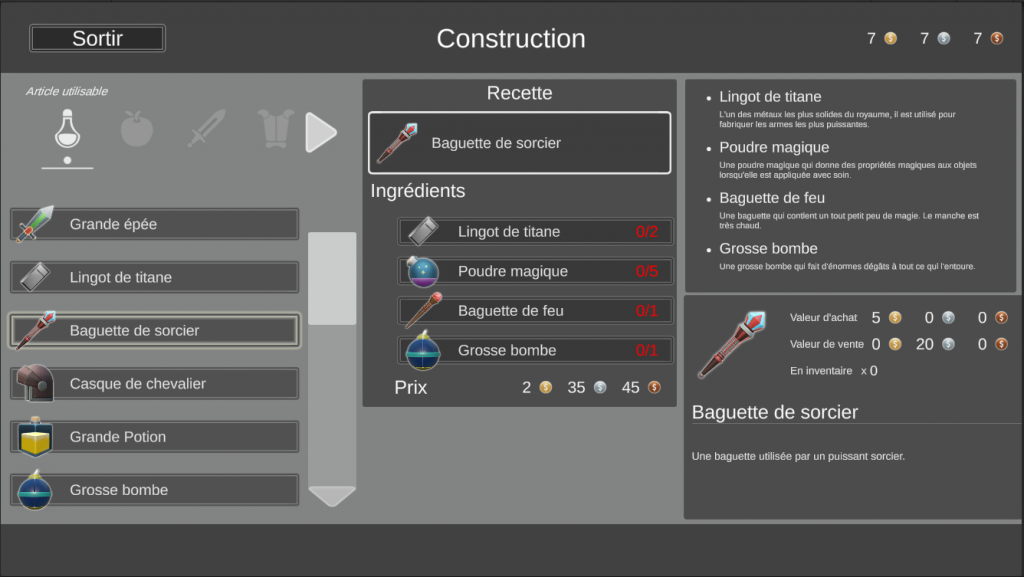
To change the local press the toggle top right of the game view during play mode. This dropdown appears automatically when the Unity Localization package is installed.
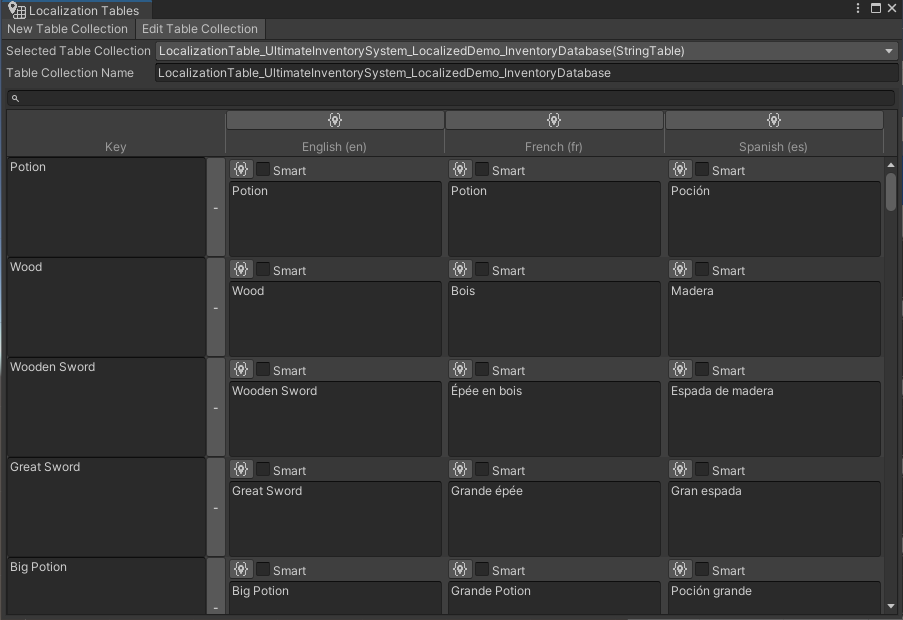
The demo contains two localization tables. The first is for the Inventory Database objects and data and the other is for constant UI text.
- LocalizationTable_UltimateInventorySystem_LocalizedDemo_InventoryDatabase
- LocalizationTable_UltimateInventorySystem_LocalizedDemo_UI
To speed up the creation of the translation table the Inventory Database was exported to CSV and imported it in google sheet. From there the relevant data (item name, description, item category name, recipe name, etc.) was copied to the another google sheet to make the localization table. That table was then exported into a CSV file and imported into Unity. The Localization Table CSVs used are within the integration demo folder.
- UIS Localization Table – LocalizationTable_UltimateInventorySystem_LocalizedDemo_InventoryDatabase
- UIS Localization Table – LocalizationTable_UltimateInventorySystem_LocalizedDemo_UI
To create a localization table go to Window -> Asset Management -> Localization Tables. To import the CSV data within the table click on the table asset and add an Extension. To learn more read the Unity Localization package documentation.
For descriptions the key “<ItemName>_Description” was chosen allowing the “LocalizeItemView” to draw our description text by setting the string format with a suffix as “{0}_Description” where {0} is the item name.

Localizing an existing Inventory Database
It is always recommended to start localization early in the project to avoid doing a full revamp of the Inventory database at the last minute before release. But in some cases you don’t have a choice and must convert an existing database which has everything in one language to a database that can be used with a localization package.
If that is your case it is recommended that you use the Import/Export feature within the Inventory Editor Manager to export your database into a CSV file. That will allow you to have your object names and item descriptions within a table. From there you can copy paste the relevant data into a localization table (for example a google sheet with column: Key, English(en), Frechn(fr), Spanish(es), etc.).
You can then replace the descriptions within the exported inventory database table with the description keys within the localization table and import the database with the updated description attribute values. You can choose to simply remove the values completely, or simply ignore them like is done for the integration demo scene.
For the key of item names you may choose to keep them as is, or add a prefix, suffix and perhaps replacing the spaces by underscores. When using the integration components for the Item Views you will be able to convert your item name into the item key which will then be used to get the localized item name. The same can be done for other inventory objects (i.e Item Definition, Crafting Recipes, Item Category, etc.).