Editor Window
Organization
Before creating any inventory objects it is recommended that you first have a plan for how to organize the inventory. The first thing that you’ll want to think about is the Item Categories. The Item Categories are the most important inventory object as it structures your item database, it decides the attributes for all of the items, and it is also used to separate that actions that can be performed on each item.
Once the categories are specified, the next step is to create the Item Definitions. Item Definitions can be thought of as templates for your items. The Item Definition will have attributes that are common across all of it’s item instances. Each item instance may have a different attribute value for the same Item Definition. As an example you may have a “Big Sword” Item Definition but this sword has different attack values for each item instance.
Adding Objects
When a database is created it is given an Uncategorized Item Category and Crafting Category. These cannot be removed. Item Definitions require an Item Category to function properly and will be given an Uncategorized category when they are created in the editor. Similarly a Crafting Recipe will be assigned to the Uncategorized Crafting Category.
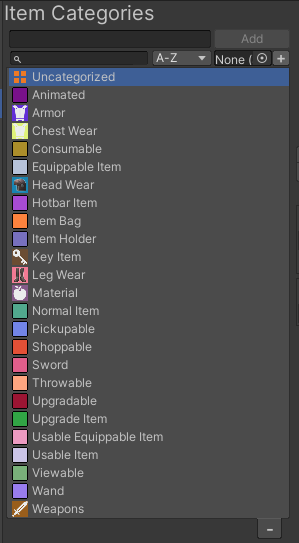
New inventory objects can be added by opening their respective editor and by entering the name within the field next to the “Add” button. The search bar and sorting options allow objects to quickly be found within the editor. Selecting the object from the list will allow you to edit it within the editor.
When an object is created in the editor it is saved as a ScriptableObject and a reference to that object is stored in the Database. Most objects that are related (i.e Item Definition and its Item Category) will keep a reference of each other.
Removing Objects
Removing objects can cause confusion as some objects are dependent on others. To make sure things are clear we specify here exactly what happens when one of the objects is deleted.
Removing Item Categories
When an Item Category is removed the connection to the children is broken. If the category has any parents these will be connected to the children. When the category is deleted the children will keep all the attributes that were “required” by the deleted category
All the Item Definitions that had a direct link to the deleted category are either given a category that was a child of the deleted category, or a parent. If neither exists it will be assigned to the Uncategorized category.
If the category is removed at runtime all Item Definitions and Items of that category are unregistered.
Remove Item Definitions
When an Item Definition is removed the connection to the children of the Item Definition being removed is broken. If the Item Definition has a parent then the child Item Definitions will be parented to their former grand parent Item Definition.
If the Item Definition is removed at runtime all of the Items belonging to that Item Definition are unregistered.
Removing Items
When an Item is removed no extra cleanup is required. The Item Categories and Item Definitions do not depend on the Item.
If a MonoBehavior is dependent on the Item an event function is triggered by the Item Object component just before the item is removed so extra cleanup logic can execute.
Searching, Filtering and Sorting
The object list panel comes with a search bar which includes a sorting dropdown and a filter preset. Objects can be searched by name or in some cases can be searched by using special conditions using predefined tokens.
For example the Item Category has the following search tokens:
- “c:<categoryName>” : Use the “c:” prefix in the search bar to filter all categories that have the category with that name as direct parent.
- “i:<categoryName>” : Use the “i:” prefix in the search bar to filter all categories that have the category with that name as an ancestor (the category Inherits from that ancestor category).
- “a:<AttributeName>” : Use the “a:” prefix in the search bar to filter all categories that have an attribute with that name.
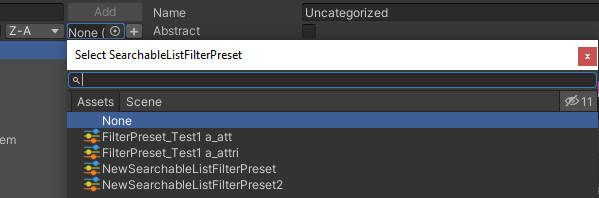
If you often search for objects using the same search filter use the SearchFilterPreset. On the right of the search bar you will find a object field and a “+” button. Press the button to create a new search filter preset and then add it in the search field. Each time the Editor Window is opened the search bar will automatically use the saved search filter. This is a great way to organize your objects since the objects are showed as a flat list.
Advanced Filters
It is possible to create custom Search filter presets to create advanced fiter conditions. Simply create a scriptable Object that inherits the “SearchableListFilterPreset” class. And then override the “IsValid” function.
/// <summary>
/// An object used to create filter and sort presets for the searchable list visual element.
/// </summary>
public class SearchableListFilterPreset : ScriptableObject
{
    [Tooltip("The default search string.")]
    [SerializeField] protected string m_SearchString;
    [Tooltip("The default Sort option, indicated by index.")]
    [SerializeField] protected int m_SortOptionIndex;

    public string SearchString { get => m_SearchString; set => m_SearchString = value; }
    public int SortOptionIndex { get => m_SortOptionIndex; set => m_SortOptionIndex = value; }
    /// <summary>
    /// Returns whether the object is valid (the string search is done separately).
    /// This function can be overwritten to make custom searchable list filters with more advanced properties.
    /// </summary>
    /// <param name="obj">The object to check if valid.</param>
    /// <returns>True if the object is valid.</returns>
    public virtual bool IsValid(object obj)
    {
        return true;
    }
}