Attributes
Attributes are objects that define a value based on a unique name. Attribute values can be changed for Item Categories, Item Definitions, and Items. Attributes can only be created from the Item Category. Attributes created within the Item Category will be passed down to the Item Definitions and Items that belong to the category. Item Category attributes can be thought of as a variable declaration. Attributes within Item Definitions and Items can then be thought of as getting or setting that variable value.
Since attributes are defined from the Item Categories, there are a few options that are only available in the attribute editor within an Item Category. Compare the two screenshots below. The top screenshot was taken within the Item Category editor, and the bottom screenshot was taken within the Item Definition editor.
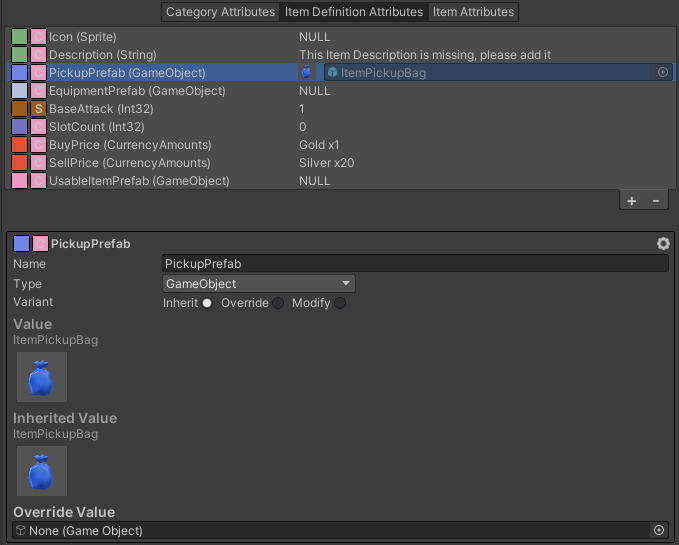
The list shows the name, type and the value of the attribute. Apart from models, prefabs, and sprites, the values are represented as text. There are two colored boxes next to the Attribute name. The box on the left represent the source of the attribute. The attribute source will always be an Item Category and the category can be accessed by clicking on the colored box. The right box shows where the attribute is being inherited from. The letter within the box shows the inherited object type:
- C: Item Category
- S: Source
- I: Default Item
- D: Item Definition
In the Item Category editor the following can be changed:
- Name: The name of the attribute. The attribute name must be unique for that Item Category and must start with a letter and include only letters, numbers and underscores.
- Type: The object type that the attribute represents. After the attribute has been created the type can be changed by clicking on the Type drop down. The selected object type will create a new attribute of generic type Attribute<T> where T is the object type. If a custom attribute type is selected then it will not be a generic type.
Important: New types can be added to the Types drop down. To do so go to Tools -> Opsive -> Unit Options and add your custom type. More details on this can be found within the Attributes page.
- Variant: The Variant option has three values:
- Inherit: The attribute value will be determined by the parent attribute.
- Override: The attribute value will be determined by the specified value.
- Modify: The attribute value will be determined by a formula. See the Modify Variant section of the documentation for more details.
- Pre-evaluate: This toggle can be accessed from the cog button on the top right of the attribute view. If an attribute is pre-evaluated then the attribute value will be cached and will not be recomputed every time it is accessed. This is most apparent when the Variant value is set to Modify.
- Move To: This option can be access from the cog button on the top right of the attribute view. This option allows you to easily move an attribute between the three Attribute collection. By moving an attribute between the Item Definition and Item the attribute will keep all the values that were set for its children. If the attribute is moved from the Item Definition or Item to the Item Category then all the non-Item Category attribute values will be lost.