Split Screen Co-op UI
The Inventory System allows for co-op with split screen UI. Below is shown an example for a co-op setting where players are on one screen and each have their own independent UI.
Bother players have their own canvas with their Inventory
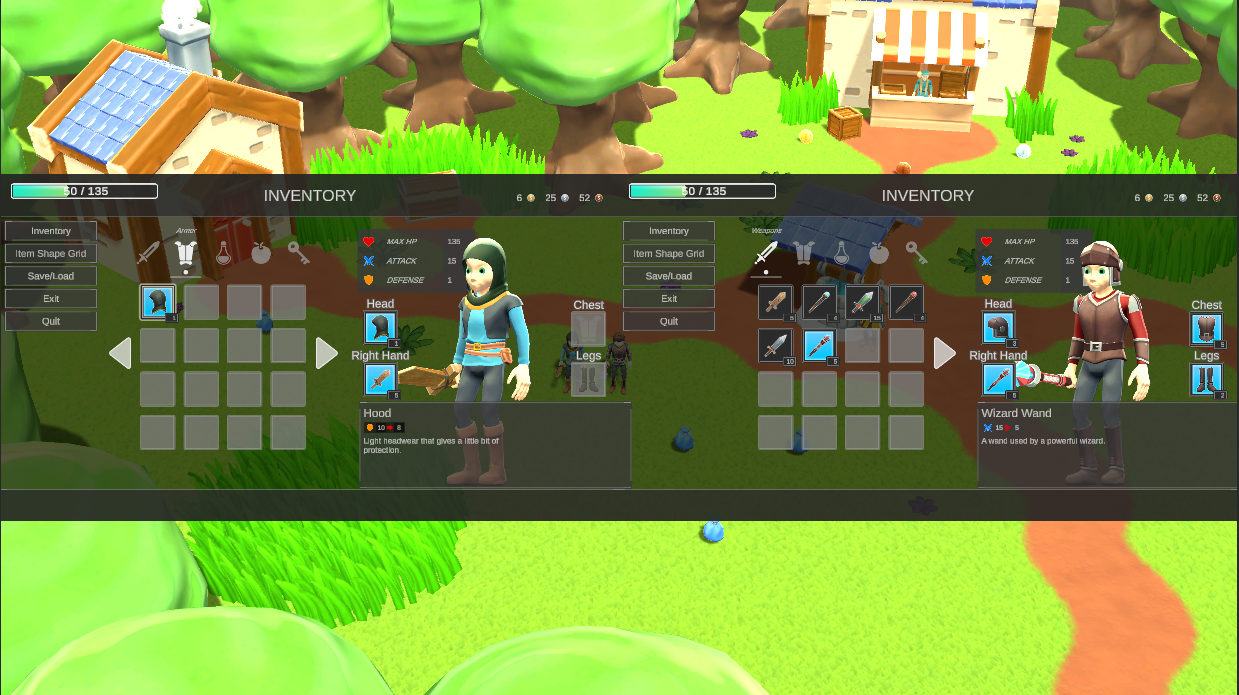
If the option to set time scale to zero when a panel is opened is set to false on both Display Panel Managers, a player can run around while the other does some shopping.
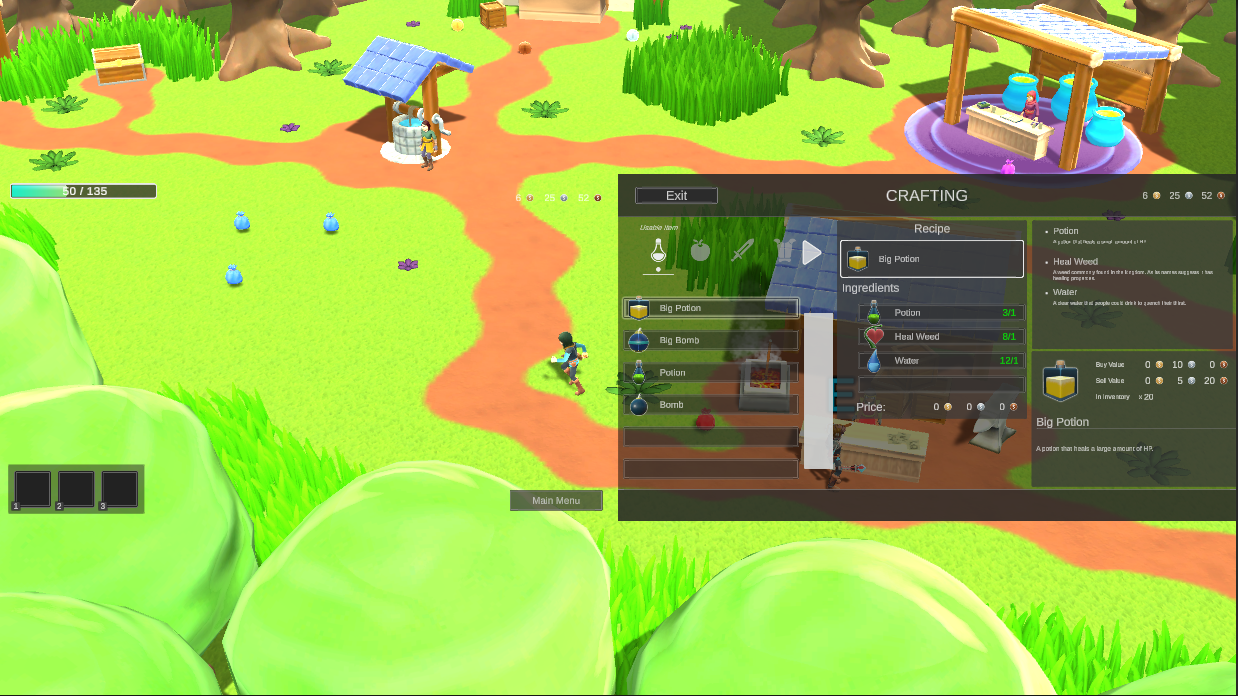
Menus like the Shop, Crafting, etc… can be opened independently for each player. Both players are allowed to use the same Shop and Crafter at the same time.
There are some restrictions to split screen UI:
- Both characters must have their own UI canvas.
- You must use the new Input System from Unity or Rewired from the asset store.
- When using this method with the new Input System from Unity only gamepads can be used, keyboard and mouse won’t work in the UI at all (a current limitation of the new Unity Input System, which Unity plans to fix in future versions).
Here are the steps to turn the demo into a Split Screen UI scene.
Import one of the advanced Input System & Integration
New Input System From Unity
The following steps should be performed in order to setup the Unity input system with your character:
- Import the new Input System package from the package manager. Once you import the Input System package you must also import the integration it can be found here.
- On the Player Character GameObject replace the “Unity Input” component with the “Unity Input System” component from the integration.
- Make sure your Player Character GameObject also has a Player Input component from the new Input System package. It must reference a Input Action Asset. You may create one from scratch, but for convenience it is recommended to use the one provided in the integration: Character Input.
- Test the demo to make sure everything still works.
Rewired
The following steps should be performed in order to setup the Rewired input system with your character:
- Import the Rewired package from the asset store or the package manager. Once you import the Rewired package you must also import the integration it can be found here.
- On the Player Character GameObject replace the “Unity Input” component with the “Rewired Input” component from the integration.
- Add the “Rewired Input Manager Co-op” prefab from the integration package into your scene. This prefab has the inputs pre-setup for co-op. “Player1” with ID 0 and “Player2” with ID 1. This ID must be set on the Rewired Input component.
- Test the demo to make sure everything still works.
Duplicate the player & UI
The second character and UI should now be added to the scene. This can be done by performing the following steps:
- Duplicate the player GameObject and the Inventory Canvas.
- Resize the top level panel in the canvas such that it fits half the screen. The easiest way is to scale it by half.
- On the players make sure to set a different Inventory Identifier ID (recommended 1 and 2). If you are using a Dynamic Panel Owner make sure to use the same ID for the Inventory Identifier and the Panel Manager.

- Remove the Event System Game Object. Replace it by with two Game Objects called Event System 1 and 2.
Unity Input System
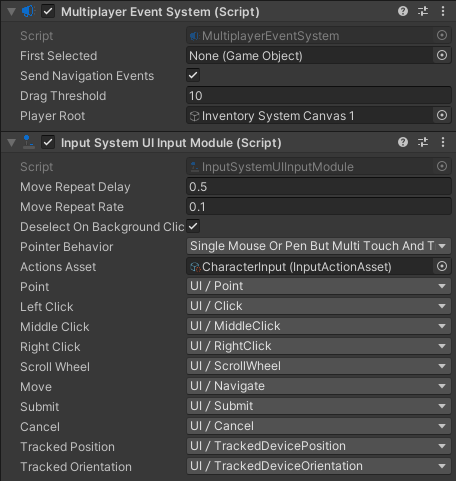
- On these Event System Game Objects add two components: Multiplayer Event System and Input System UI Input Module. Both are part of the Unity Input System.
- In the “Player Root” field of the Multiplayer Input System make sure to assign the appropriate Canvas.
- By default the Input System UI Input Module will use a UI Action Asset. This should be removed. The Input System UI Input Module within the Player Input on your character should be referenced instead. Make sure that each player points to a different Event System GameObject.
- On the Player Input component set the Default Scheme from <Any> to Gamepad. Keyboard input does not work for multiplayer event systems.
Rewired
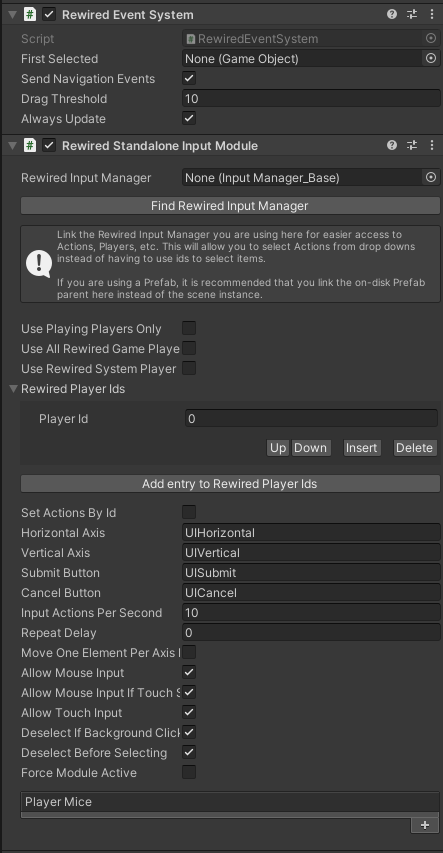
- On these Event System Game Objects add two components: Rewired Event System and Rewired Standalone Input Module. Both are part of Rewired.
- Make sure to set the appropriate ID on each Rewired Standalone Input Module.
- The “Always Update” field must be set to true on both Rewired Event System
- Setup the Canvas:
Assign different IDs for each Inventory Canvas. The ID should be set to the same ID as the Inventory Identifier ID you plan to use. The Panel Owner should then be assigned by reference or automatically using the ID.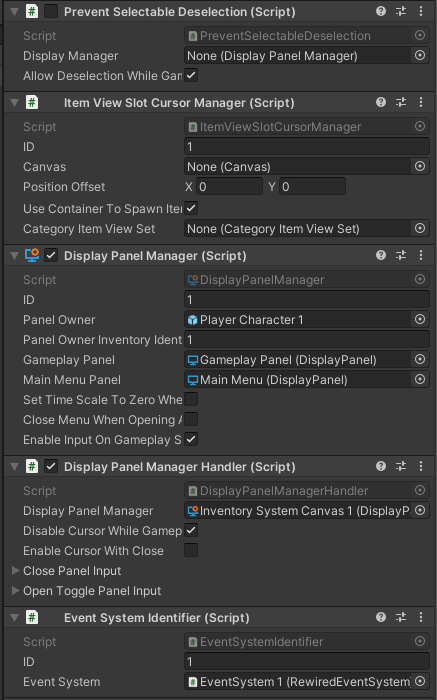 Add a Event System Identifier to your Canvas. It should reference the correct Event System. The Event System Identifier must be set on the Canvas, as the Selectable components within our system are selected using a Event System Manager. The Event System Manager is used to find the relevant Event System for the Selectable. As a result an Event System Manager should be added on the Game Game Object, with the other managers.
 - Additional steps for the Demo scene:
- If you are using the Demo scene make sure to manually fix the Inventory Monitor and HP Monitor references.
- If you are using a 3D model of Player Character in the UI make sure to create a new Texture and assign it in the UI character camera and the Raw Image Texture