Overview
Behavior Designer Pro is the follow-up to the most successful behavior tree tool for Unity. Behavior Designer Pro takes all of the popular features from the original version and brings them over to DOTS. If you are not using DOTS in your project that’s no problem – you can get the benefits of DOTS without even having to know that you are using it.
This guide is going to give a general overview of all aspects of Behavior Designer Pro. If you’re just getting started with behavior trees we have a “Behavior Tree Basics” video series. This page also has a quick overview of behavior trees. With Behavior Designer you don’t need to know the underlying behavior tree implementation but is a good idea to know some of the key concepts such as the types of tasks (action, composite, conditional and decorator).
You can open Behavior Designer Pro from the Tools -> Opsive -> Behavior Designer -> Editor toolbar. When Behavior Designer Pro opens you’ll see this window:
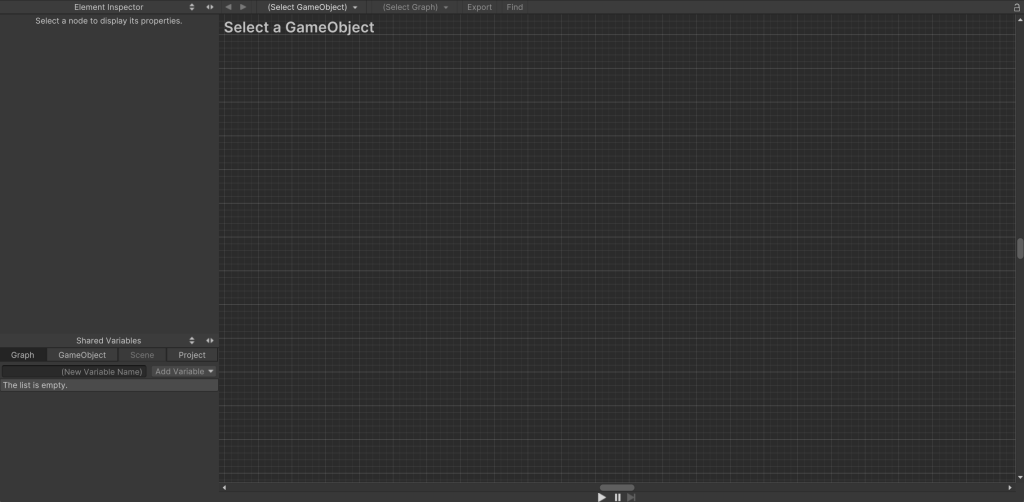
There are four sections within Behavior Designer. From the screenshot below, section 1 is the graph area. It is where you’ll be creating the behavior trees. Section 2 is the inspector panel. The inspector panel is where you’ll be editing the task field values or creating new variables. Section 3 is the behavior tree operations toolbar. The final section, section 4, is the debug toolbar.
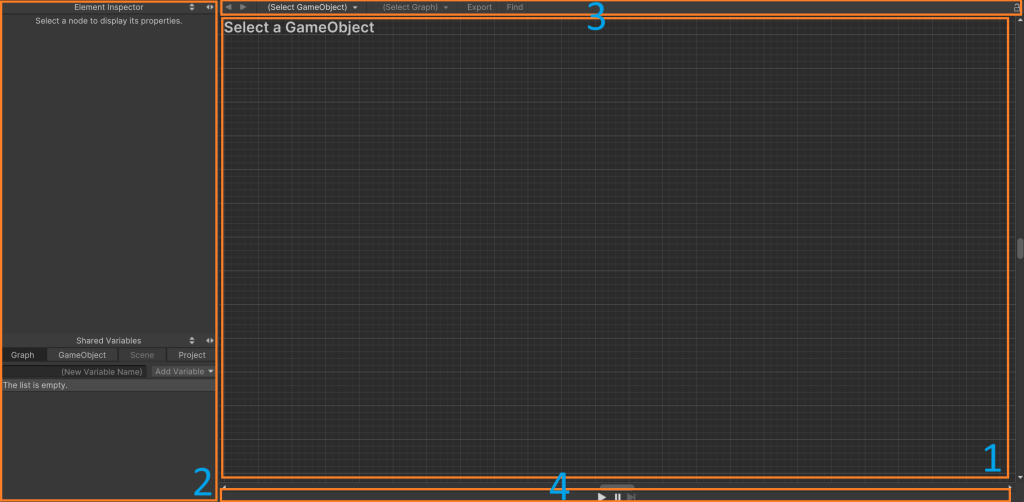
Section 1 is the main part of Behavior Designer that you’ll be working in. Within this section you can create new tasks and arrange those tasks into a behavior tree. To start things off, you first need to add a Behavior Tree component. The Behavior Tree component will act as the manager of the behavior tree that you are just starting to create. You can create a new Behavior Tree component by right clicking within the graph area and clicking “Add Behavior Tree” or by clicking on the plus button within the operations area of section 3.
Once a Behavior Tree has been added you can start adding tasks. Add a task by pressing the space bar or right click within the graph area and select “Create Task”:
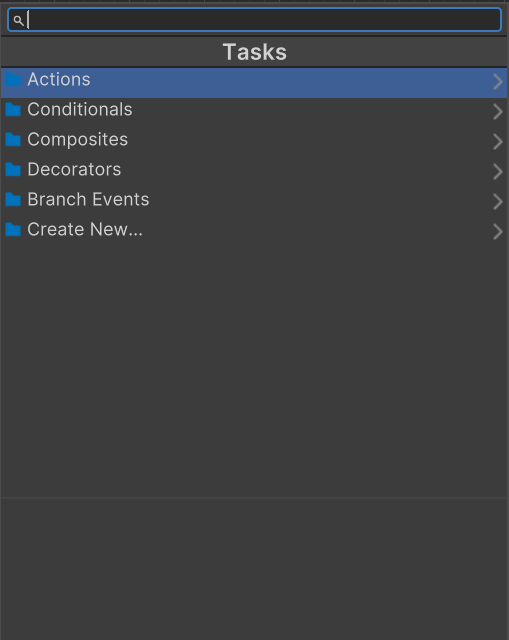
Once a task has been added you’ll see the following:
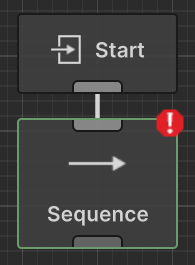
In addition to the task that you added, the Start event also gets added. The Start event acts as the root of the tree. The Sequence task has a green border because it is a pure ECS task. It also has an error because it has no children. As soon as you add a child the error will go away. Now that we’ve added our first task lets add a few more:
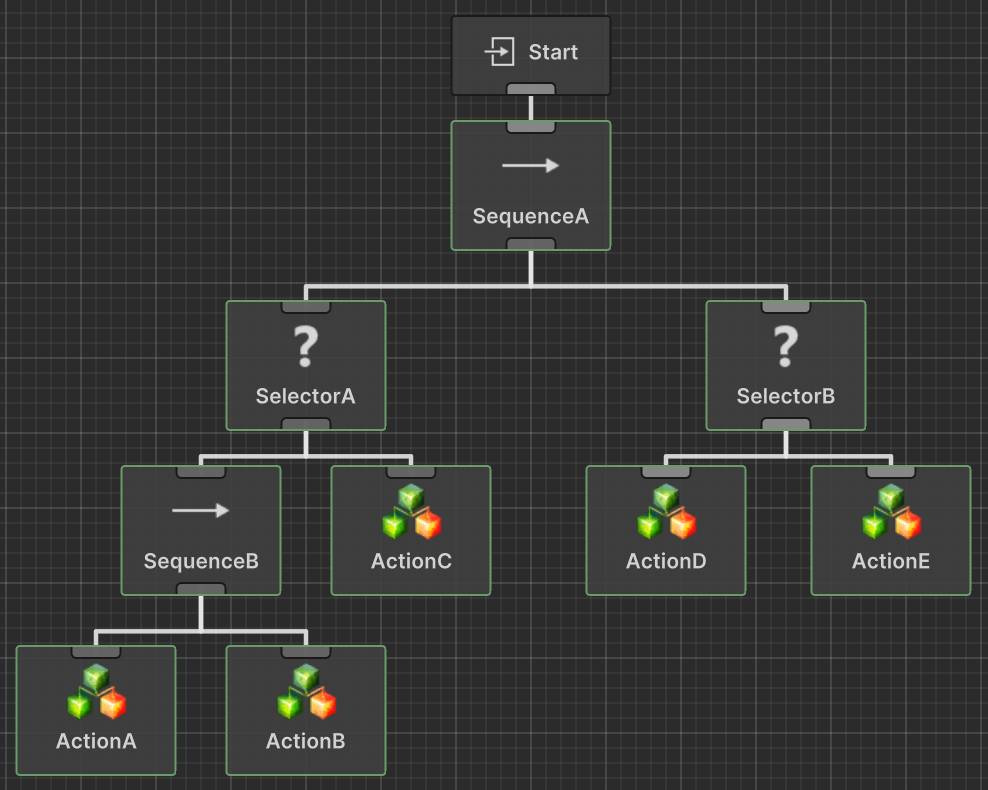
You can connect the sequence and selector task by dragging from the bottom of the sequence task to the top of the selector task. Repeat this process for the rest of the tasks. If you make a mistake you can select a connection and delete it with the delete key. You can also rearrange the tasks by clicking on a task and dragging it around.
Behavior Designer will execute the tasks in a depth first order. You can change the execution order of the tasks by dragging them to the left/right of their sibling. From the screenshot above, the tasks will be executed in the following order:
SequenceA, SelectorA, SequenceB, ActionA, ActionB, ActionC, SelectorB, ActionD, ActionE
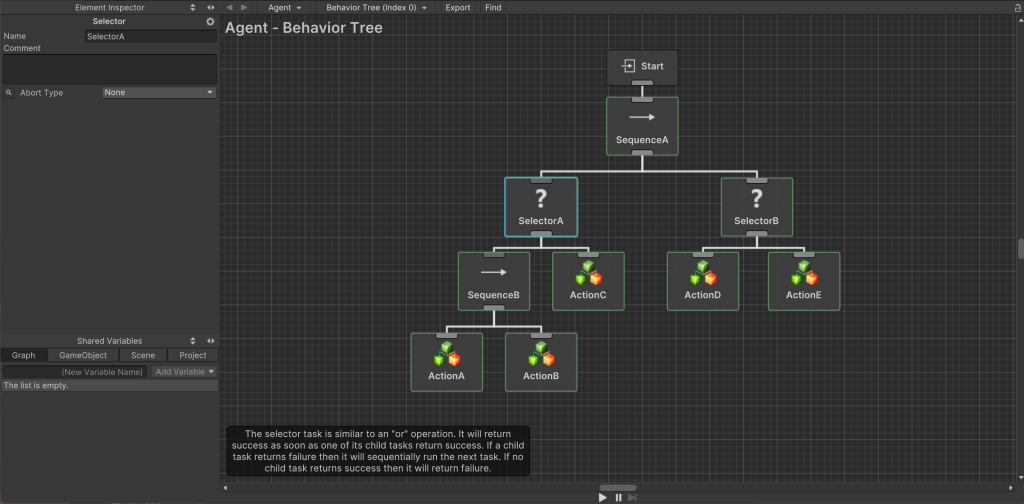
Now that we have a basic behavior tree created, lets modify the parameters on one of the tasks. Select the SelectorA node to bring up the Inspector for that task. You can see here that we can rename the task or add a comment. We can also modify all of the serialized variables that the node contains. This includes assigning variables using the SharedVariable system. In our case the only serialized variable is the Abort Type. The Shared Variables panel on the bottom left allows you to create variables that are shared between tasks, GameObjects, scenes, or projects. The Elements Inspector panel and the Shared Variables Panel can be rearranged and resized.

The top section within the Behavior Designer window is the operations toolbar. The operations toolbar is mostly used for selecting behavior trees as well as adding/removing behavior trees. The following operations are labeled:
- Label 1: Navigate back from the last behavior tree that was opened.
- Label 2: Navigate forward to the next behavior tree that was opened.
- Label 3: Lists any GameObject within the scene that has the behavior tree component added to it.
- Label 4: Lists any behavior trees that are attached to the GameObject that is selected from label 3.
- Label 5: Exports the behavior tree to a Subtree ScriptableObject.
- Label 6: Opens the find dialogue which can search your behavior tree.
- Label 7: Keeps the current behavior tree active even if you have selected a different GameObject within the hierarchy or project window.
You can find the preferences for Behavior Designer Pro within the Unity Preferences window. From here, we recommend that you take a look at the new task page if you’re interested in adding your own logic. Conditional Aborts are an extremely useful feature and we highly recommend that you use them. Finally, the variables page is the last page that we consider necessary when working with Behavior Designer.