Getting Started
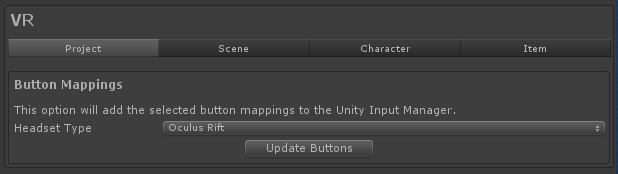
In order to play the demo scene your project must first be setup to work with a VR device. See the Unity VR documentation for instructions on how to enable VR for your project. Before playing the demo scene ensure you have also setup the correct button mappings for your device. You can do this from the Tools -> Opsive -> Ultimate Character Controller -> Add-Ons Manager and then selecting the Project tab.
One Handed Tracking
By default the demo scene is setup for a two handed tracking headset such as the Rift or the Vive. If you’d like to use a single handed tracking headset (such as the Oculus Go) you can enable Free Roam under the VR Demo Manager component and then select One Hand First Person for the Free Roam Character.

On the First Person VR View Type the Parent Items VR Camera field should then be enabled.
Lightmapping
In order to reduce the download size the demo scene does not contain any lightmapping. When the scene first opens it will appear dark and this can be corrected by baking the scene. If the lights are not baked before hitting play they will automatically be disabled.