Scene
Before setting up the PUN Multiplayer Add-On ensure you have first setup the scene and camera with the standard Scene Setup manager. After the scene has gone through the standard setup, the scene must then be setup for PUN in order for it to work over the network. The scene can be setup through the PUN Multiplayer Manager. The PUN Multiplayer Manager can be accessed from the Tools -> Opsive -> Ultimate Character Controller -> Add-Ons Manager -> PUN Multiplayer.

The Setup Scene button will add the following components:
- PunObjectPool: Provides a way to synchronize pooled objects over the network.
- SpawnManager: Manages the character instantiation within a PUN room.
- PunStateManager: Ensures the states are synchronized when a new player joins the room. StateManager.SendStateChangeEvent must be enabled for this component to work.
- ItemTypeTracker: Maps the Item Type ID to the Item Type over the network.
These components are added to the new “PunGame” GameObject within the scene.
If Add Scene Identifiers is selected the manager will add the PunObjectIdentifier component to every collider within the scene. When a melee weapon collides with a scene object all of the other clients need to know which scene object was hit. Normally you’d add the PhotonView component to this scene object to make it identifiable over the network but in this case the Photon View component is overkill for what we need. The Pun Object Identifier component inherits the Object Identifier and ensures the melee weapon can identify which object was hit. Note that you must rerun the scene setup every time you add a new collider to the scene.
PUN Object Pool
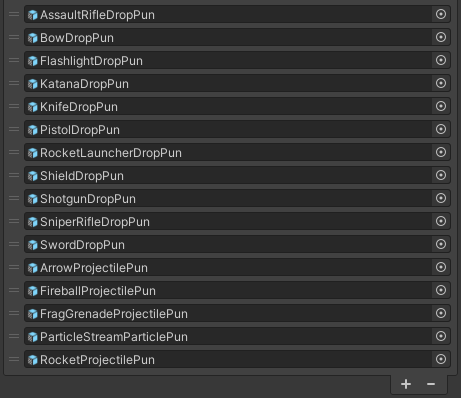
The PUN Object Pool synchronizes pooled objects over the network. Any object that should be synchronized needs to first be defined within the Spawnable Prefabs list of the PUN Object Pool. Spawnable Prefabs include objects such as projectiles, grenades, pickups, etc. Objects that are not synchronized over the network, such as decals, particles, or other effects, do not need to be specified within the Spawnable Prefabs list.

Item Tracker
Similar to the Runtime Pickups component, the Item Tracker component is used to ensure the network is aware of all of the Item Types that can be equipped. The Item Tracker component has a Item Collection field which allows all of the Item Types to be loaded when the room starts.
Spawn Manager
The Spawn Manager is responsible for instantiating new characters when a player joins. By default the Single Character Spawn Manager component will be added and it will always spawn the character specified by the Character field. If you’d like to spawn a different character prefab you can override the SpawnManagerBase.GetCharacterPrefab method. Use cases for this may be if you’d like each player to have a unique character model or if you are spawning the character into a team based game.
using UnityEngine;
using Opsive.UltimateCharacterController.AddOns.Multiplayer.PhotonPun.Game;
using Photon.Realtime;

public class MySpawnManager : SpawnManagerBase
{
    /// <summary>
    /// Virtual method which allows for a character to be spawned based on the game logic.
    /// </summary>
    /// <param name="newPlayer">The player that entered the room.</param>
    /// <returns>The character prefab that should spawn.</returns>
    protected override GameObject GetCharacterPrefab(Player newPlayer)
    {
        return null; // Replace with your own game logic.
    }
}
GetCharacterPrefab is run on each client instance so it should should return a deterministic value. If it does not then each client may have a unique character model for that player.